


Hello all! I’m back on my blog in time for the holidays with an embossed card and the Rita Handmade Christmas Blog Hop! We have several fabulous designers to help get those creative ideas going! Do you need a gift idea, wrapping idea, holiday card or decorating item?
Let’s make it handmade!
Oh, and let’s help you out with that: One lucky winner will receive a $40.00 gift certificate to Amazon! Who couldn’t use a little cash these days?

Here’s how to enter to win:
- Subscribe to Rita Barakat’s newsletter ( if you already do say so in the comments below)
- Leave comments on all the fabulous posts on the hop (including this one! The list is at the bottom of this blog)
- Follow Rita Barakat Art on Instagram
And I would be grateful if you follow me, too! @B_Enchanted on Instagram
(And have you seen Rita’s new Canvas Art Journal and Accessories line? Helloooo! I’ll be doing blogs with the canvas next week and after! Watch for my post announcements on Instagram.
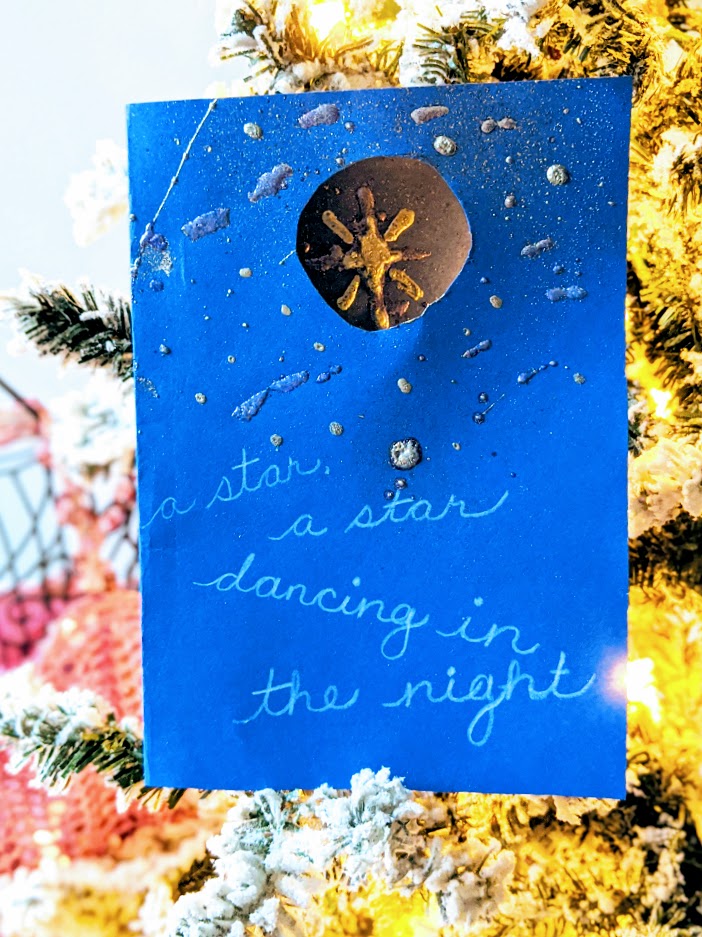
For this awesome blog hop I have a Christmas card I made for family and friends. It features the Star of Bethlehem and song lyrics – I love using Christmas Carol lyrics as inspiration for holiday cards! This year, I joined a local choir in time to rehearse the holiday concert and now I have “Do You Hear What I Hear” humming in my head all the time! That was also the first song I had a solo in, in my first choir at 9 years old, for the church Christmas pageant!
I was inspired by the line:
A star, a star/
-“Do you hear what i hear” , lyrics by noël regney and music by gloria shayne
Dancing in the night/
With a tail as big as a kite
For my card, I kept it simple so the focus is on the shining star. Click through the gallery below for images of my steps. Here’s the supply list:
- Dark blue card stock, cut to 7″ H x 10″ W. I used a Colonial Blue but this would also look sharp in a navy blue.
- Pencil
- Metallic or white fine pen or pencil, your choice. Just make sure it writes smoothly and is opaque on the dark card stock.
- Paper or craft glue, thin. I used PVC bookbinding glue but any craft glue will work.
- Alphabet letter stamps (optional), Merry Christmas sentiment stamp, and a metallic ink stamp pad, (optional).
- Rita Barakat Magical Mysteries Fairy Wing Embossing Powder Kit
- Heat emboss tool
- Paper trimmer or scissors
- Ruler
- Bone folder
- Small square paintbrush
- Thin, pointed paintbrush (or pencil tip)
- Small hole punch, approx. 1.” x 1.” or a cutting surface and craft knife. Circle or square/diamond preferred for this project. I went free-form and used the knife.
- Embossing tray to catch extra embossing powder (or a shoe box lid will work in a pinch)
- Newspaper or other surface cover to catch splatters (oh yeah, we’re getting a little messy!)
- Card envelope
First, you are going to cut your dark card stock into a 7″ x 10″ rectangle. Then, line up the two short edges and when you have the corners even, gently crease with the bone folder (or the side of your pencil) to make a crisp, straight crease and ta-da a 5″ W x 7″H card.
Next, here’s the tricky part. Using a ruler, in the top third of the card front, find the center and mark with the pencil, then mark 1.5″ down. Next, using your hole punch, punch over that last mark in the center of the shaped hole – one layer only! Just the card front! You should create the hole so that it has 1.5″ card stock above the top of it so doesn’t easily tear, and still be in the top half of the card. You should be able to see the interior of the card through the hole. (If you are using a craft knife, open it flat and inside DOWN on a cutting surface to do the same thing on the right-hand side of the card like I did I wanted a more free-form shape.)
Now, mark the center of that hole on the card stock behind it with your pencil. Open the card and use the ruler to make a plus (+) sign over that pencil mark, then extend the lower vertical line a little farther (like a cross). Try to keep it within that punched window.
Using your paperclips, gently clip the card closed. This is so the next step stays mostly on the outside of the card, but there will be embossing on the inside, too. Your card should now go on a covered surface because this is where the messiness happens! Using your dry square paintbrush, sparingly pick some up paper glue and flick the top bristles with your finger, aiming across the top of the card (I suggest doing a trial run on scrap piece or a paper towel to get the feel for how it splatters.) You should be making small splatters of glue drops across the top of your card, including across the punch out. Now, quickly before the glue dries!, go over the penciled cross with your glue using a fine paintbrush or a pencil tip. Add a small dot or diamond in the middle of the cross.
Place your card in your embossing tray glue up and sprinkle Fairy Wings iridescent base over the card, and shake off the excess. Using the heat emboss tool, emboss all those little splatters into a night sky, and the cross and dot into the Christmas Star. When they have all bubbled up and turned shiny, add a few glue dots with your pencil tip and another layer over the star. Shake the Fairy Wings Gold over and repeat the heat emboss. Remove the paperclip so it doesn’t make dents and let the embossing cool and set.
For the song lyrics, I wrote across the front and inside with the white pencil and a ruler. If you prefer, use your metallic ink pad and alphabet stamps to add the words to the front. You can also stamp the Merry Christmas Sentiment inside.
That’s it! I’m giving these cards to close family and friends this year with their gifts, and leaving them with my holiday donations. Please leave your kind comments on this blog and let me know if you made this project! I love to hear what see what you did with my ideas!


Please continue on with the hop from here to all the lovely handmade projects you haven’t checked in with yet! Be sure to tune into Rita Barakat @Rita Barakat.1 on Facebook, Monday, November 25th at 8:00 pm CST for Mixed Media Monday when she will announce the winners!
Rita Barakat, Rita Barakat Art
Martha Lucia Gomez, Stampartpapel
Yolie, Just Yolie
Margie Higuchi , Scraps (of my) Life
Cheryl Boglioli, Living The Art Life
Hannah Rubenstahl, Fanciful Spaces

What a great card! I love the use of the carols, too.
LikeLike
Love this card and the Carol inspiration!
LikeLike
Beautiful card and I love the shimmer and shine on the star!
LikeLiked by 1 person
Such a fun card! love how you did this!
LikeLike
Nice card. Love the song. Thanks for sharing!
LikeLike
This is such a lovely card, Liza. Thank you for sharing such a beautiful piece!! Oh, I love receiving Rita’s awesome newsletter!
LikeLike
Gorgeous! I LOVE that you used a song to inspire you!
LikeLike